The Electronic In and Out Board
![]()
Manual
![]()
![]()
![]()
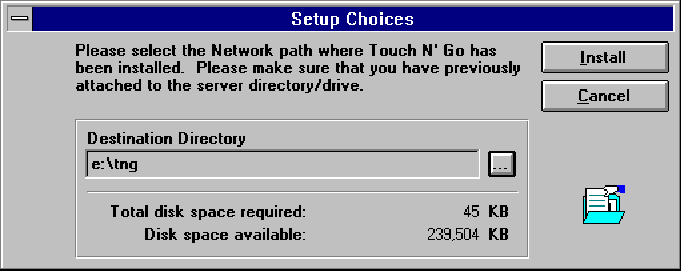
You will be brought back to the Setup Directory Menu. (See illustration below.) Your destination directory will have already been entered in the text box labeled Destination Directory. If the information is correct, click the Install button to continue with the setup of Touch N' Go. You can also type in the path.
You will be asked for the Destination Program Manager Group. (See illustration below.) This is where you choose which group of programs you would like Touch N' Go associated with. The default group is called Touch N’ Go Systems. Clicking on the Create button will place Touch N' Go within this group. You can also click on a selection from the list of preexisting groups presented to you, or you can type a completely new name into the text box. If you already have a Touch N’ Go Systems, Inc. group on your system and choose the default, Touch N' Go will be added to this existing group. When you have chosen a group and entered its name into the text box provided, click on the Create button or press Enter.

Your workstation installation is now complete, and you will be returned to your normal window. The Touch N' Go icon (see the following page) will be located in the Program Manager Group you assigned to it. Double click on the icon to open the program and begin using the Touch N' Go In and Out Board at your workstation.
Repeat this installation process with each additional workstation. Touch N' Go will support a maximum of twenty users.
![]()
 |
Table of Contents | Touch N' Go | Order Form | 30 day free demo | ||||
|---|---|---|---|---|---|---|---|---|
| Next | Guest Book | Tips & Tricks |
Copyright 1995
last modified 10/4/95
All rights reserved
Touch N' Go Systems, Inc.